The Magic of Eco-Dyes: Eucalyptus Magic

For well over 5,000 years humans have been dyeing fabrics and advanced with the techniques for spinning and weaving. Plants such as madder, ford and bearberry were particularly prized for their bright colors. Over time, other plants became popular for their colors such as woad, saffron, kermes, mallow, turmeric, walnut and even juniper. The colors that they could produce ranged across the entire spectrum, although none were as vibrant as the synthetic dyes we use today. 

Given such a long history, I was surprised to learn that Eco-dyeing was a relatively new invention in the 1990’s by an Australian textile artist India Flint. The act itself is so simplistic and produces such a lovely delicate pattern one would have thought it was one of the earliest methods. Perhaps, it was and there just isn’t enough evidence left for us to discern. It is also possible that there were others before India who were using the method, but they just did not popularize it as she did. 

Eco-dyeing is very simple, as it combines two steps of the dyeing process into one. Rather than first boiling the plants to extract the dye and then adding the fabric to the boiling water to dye the fabric one seamless color, the extraction of the pigment and the application to the fabric is the same step. This produces the wonderful patterns of plants on the fabric to create a delicate web of colors and shapes. This process is known as a form of contact dye meaning the dye is transferred from the leaves directly to the fabric. 

However, while it is very simple in concept, I still desired to try my hand at it under the tutelage of an expert. Additionally, the class doubled as a birthday gift to my mom as a mother-daughter outing. I signed us up at the PA Guild of Craftsmen which incidentally was celebrating 80 years of preserving the crafts. The guild serves to promote, educate, support and encourage the craftsmen of Pennsylvania. Through their work many artists have discovered their passions, developed their talents and made a living. 

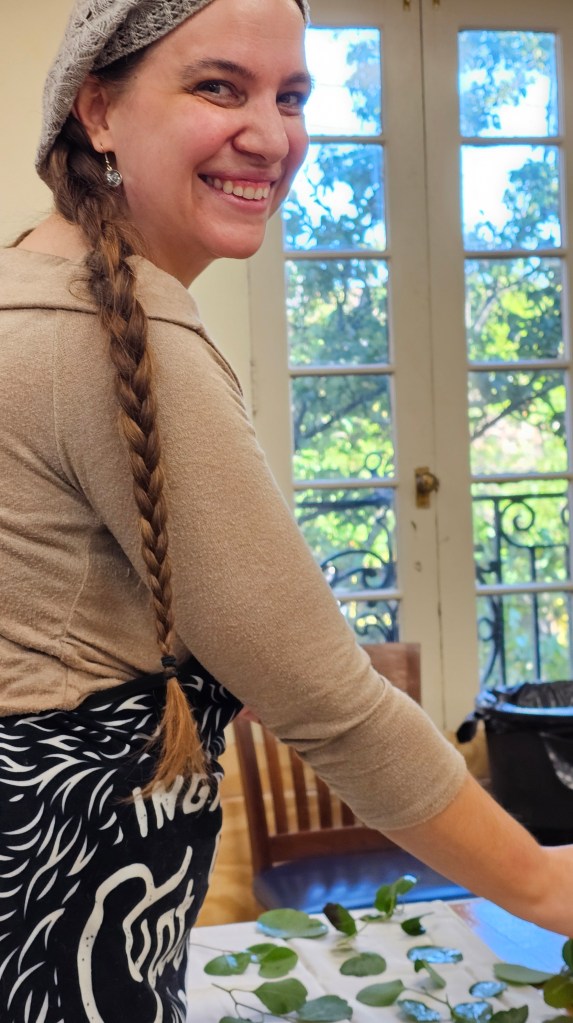
On an unusually warm October morning, we headed into the small city of Lancaster where the guild was located. As it was still fairly early the streets were still quiet which made finding parking in the garage a breeze. We took an easy stroll about a block to the location taking a note of the local eateries and shops for when the class had its break. There were instructions of how to enter the building before the Guild’s Shop opened which were easy to see and follow. Once we entered, there were lots of people who were helpful in pointing us up the stairs and down through the first room back to our classroom where we met Carol Reed, our wonderful and knowledgeable instructor. 

Carol explained a short history of eco-dyeing and laid out the general flow of the class, first we would lay out the plants, then we would wrap them around the dowel, tie them neatly, plop them in some water, wait about 2 hours and then have the “Great Unveiling”. Carol explained that we would be using Eucalyptus which could produce a color of pinkish-orange akin to salmon, a softer pink, a lighter green or a darker almost purplish green. The color was affected by different things such as the age of the eucalyptus, how long the leaves were left to boil, how tightly the leaves were pressed into the fabric, how hot the water got and how much iron water was in the water. While this is a process that could use just plain water, the iron water helps the dye adhere to the fabric and gives it some added texture and depth. 

Utilizing her expertise, she was able to give us instructions to try and get the best results for what we desired. She explained that the outside pieces would be darker so if we wanted the darker section in the middle we should roll our scarves around the dowel in a different way. She told us which parts would transfer well, telling us that the very small, delicate leaves at the end would not transfer. She explained whether the way we were layering the leaves would end up looking lovely or like a weird blotch. She helped guide us as to when we had too many leaves or too few and how far out to go on the edges. She helped us wrap them with string and explained how the string patterns would turn up like small streaks on the outside edge. 

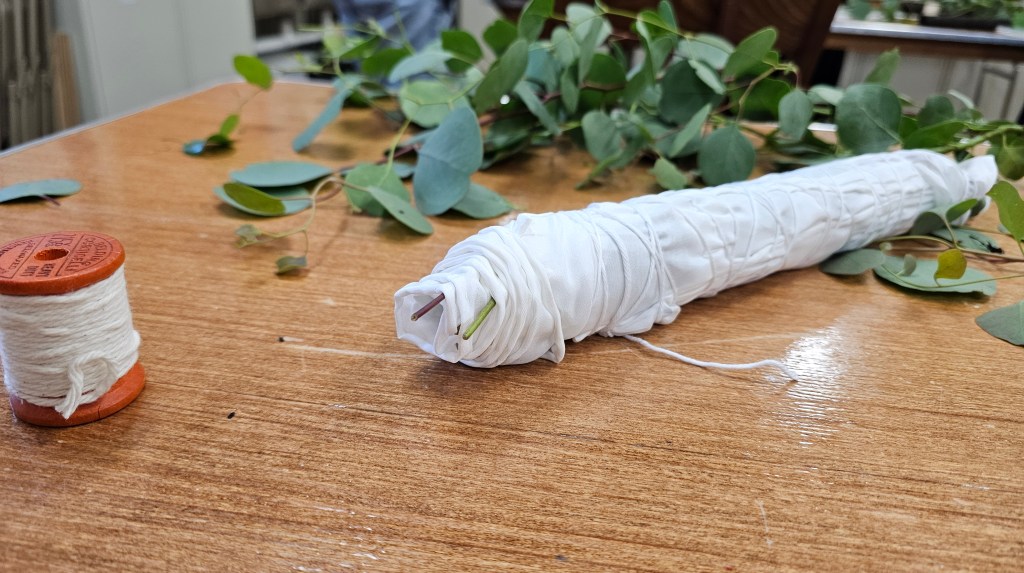
I did not try to produce any sort of pattern, preferring to fully embrace the nature of the process as organic and natural. I cut down my long stems, having been advised that the stems would not roll well and then arranged the pieces across the scarf to mimic fallen branches and leaves scattered across the ground. I was careful not to add too many layers to avoid having ugly blotches on my scarf. I paid heed to the adage that less was more, knowing that the scarf would be folded over so the dye would be layered over the scarf. With the help of my mother I carefully wound the fabric tightly around the dowel as Carol had explained that the better the contact, the better the dye would be. I tied the string taut around the bundle securing the whole thing and then made a note of what mine looked like since Carol warned us not to put our bundles in until we could compare to discern whose was whose. 

Once everyone had their bundles ready we put them in their designated pots and took a break since we would need to wait close to an hour and a half for the dye to really seep out of the leaves and onto the fabric. We were advised eucalyptus was a particularly hardly leaf which required a longer dyeing time. Carol told us that we could use a myriad of other plants for the same process, but we would find that much less time would be needed. We were also advised that if we did leave more delicate plants in that they would turn to mush and be much more difficult to get off the fabric when the dying process was over. Carol shared that the eucalyptus leaves would just fall off, but other leaves she usually has to carefully remove. 

Having previously scouted out the area on our way in, my mom and I made our way just across the street to the Onion Cafe. It was a curious blend of American and Korean food where bowls of Ramen were offered beside burgers and fries. There were one or two “fusion” items mostly consisting of the addition of kimchi to the American options. However, as I was feeling a little 

under the weather, I opted for a spicy Ramen, figuring a hot, spicy soup was the perfect panacea for what might be ailing me. My intuition was correct, as the Ramen was perfect and I felt much better afterwards. 

We then strolled through the shops. Our favorite was a vintage clothing store,that was sadly going out of business. However, this meant they were running a clearance sale resulting in some steep discounts on our purchases, two hats (one bonus hat pin), a pair of fingerless gloves and a linen top. We then headed back to the guild for the “grand reveal”. 

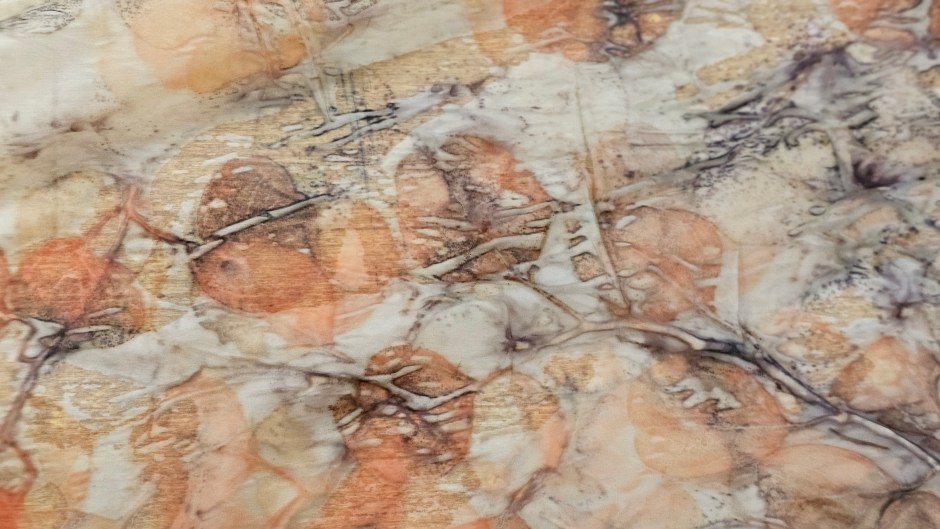
To say that I was delighted by the outcome is an understatement. I absolutely loved how my scarf turned out. Mine had transformed into soft, delicate pinks, mixed with light green hues which gradually turned into darker greens and purples. The leaves scattered across the fabric had left the impression of a field or forest of plants. The rest of the group oo’d and aw’d when they first saw it as mine was the first to be unwrapped. The others went shortly after. Despite having followed the same process, boiling in the same pots, the results ran the gambit of colors and patterns. It was so interesting and even Carol couldn’t quite explain why one person’s turned out to be a vibrant orange and another person’s stayed almost completely green. 

We were told to rinse our scarves out until the water ran clear and allow them to cure for a few days before washing or wearing them to allow the color to fully set. We were told that the colors may brighten as it dried. We thanked our instructor, packed up the scarves in small plastic bags and headed home with our prizes. 

I think what I really enjoyed about the whole process was how natural it all way from the silk fabric to the dye that only came from the leaves of the plant, to the patterns that were transferred to the fabric to even the simple ingredients of water and iron water (made from rusted nails, water and vinegar).

We are so disconnected from the process of what we wear and often what we wear is synthetic which utilizes process that are harmful to our environment and ultimately ourselves. This was a way to really connect to a tradition that, as I said, goes back thousands of years, even if it’s using a very modern technique. It was simple and elegant leading to beautiful results. 

How can you make your own eco-dyed scarf?

You can, like me, find a class nearby which offers a lesson in the technique which not only teaches you the basics but also gives you access to an expert to help guide you in learning the smaller nuances of the craft. I find such experiences worthwhile and helps to enhance any first endeavor into a craft. I also like supporting local artisans, by helping them I continue to have access to specially made objects which enrich my life and my home. My local economy improves and I help preserve this precious piece of human culture for the future. 

However, not everyone has access to craftsmen and women. However, these sorts of classes are increasing in popularity as many people are realizing that they’ve lost something by going completely digital. They want to feel physical objects, interact with their environment and embrace life. Plus studies have shown that engaging in activities of creation is good for our mental wellbeing, it reminds us that we aren’t helpless and capable of great things. 

Still, you may find, dear reader, that you are unable to locate an instructor for your dyeing needs. Do not despair, as I have told you the principles of the task are quite simple and through some experimentation you are surely to get results you are happy with. I will say that it is recommended not to use the same pot for dyeing as you do for cooking. Luckily cheap pots can be found at a local thrift store. Silk scarves can be found at dharmatrading.com and the eucalyptus can be found at your local flower shop or even some chain grocery stores. Iron water is easily made with some rusty nails, water and vinegar and you’re off! More explicit instructions can of course be found online. 

You may find that you truly enjoy the process of making eco-dyed fabrics and a new hobby as been discovered. I will say the temptation to make more is certainly there, but I shalln’t give in to the temptation as I don’t know that I have space in my life right now for another hobby. Mostly my storage spades for the supplies. Perhaps one day, dear reader. 

Completed: October 2024

Cost: $80 for the class (materials cost included) 

Miles from home: 12 

Forging Axes & Sibling Bonds!

As an avid fantasy reader, blacksmithing has always carried a bit of an allure. So when I was invited to attend a birthday party with my sister at the Drunken Smithy, I naturally acquiesced and trekked with her on a cold’s winter day to get warmed up by the forge. To say I was excited is an under-exaggeration. What could be more exciting than combining some of my favorite things, sharp objects, fire and hitting things? 

I was stoked to put my muscles to the test hammering out molten hot metal and shaping it to my will. I do work out and I always enjoy using my muscles for something other than merely moving weights up and down semi-pointlessly. It makes all those hours spent sweating worth it when I can use them competently to accomplish my goals independently. 

Forging weapons is an ancient human art. In fact the very materials that we humans used for weapons give rise to the delineation of pre-historical epochs Stone Age (stone weapons and tools – though this is such a long period of time it’s now broken down into palaeolithic, mesolithic and neolithic), Copper Age (copper weapons), Bronze Age (bronze weapons), and Iron Age. There is evidence that we humans have been using metals for over 40,000 years with the discovery of gold in some Spanish caves dating back to the neolithic era. The oldest known culture which utilized smelting was located in Serbia in the 6th millennium BC. Many places say that it originated there, but I allow for the possibility that there is an even older, yet undiscovered culture which may go back even further either in the same area of the world or perhaps, another part. 

It is this very long and ancient history that has always captured my imagination when reading about blacksmithing or other metallurgical crafts. In a way, it is the magic of our world. We take two lumps of unrefined metal and somehow through fire and our own sheer will manage to craft it into something truly useful. It was this craft that gave the rise to empires and civilizations. Advance knowledge or lack thereof could topple a once mighty kingdom or stop an invading horde. I was always fascinated by how different styles of weaponry and fighting arose in different parts of the world and how their strengths and weaknesses interacted with the styles of other cultures to rise to power or fall into ruin. 

There is reading about something and then there is doing something. I am someone who relishes doing, even if it’s only a small taste of the activity as it gives me a more intimate understanding of what I’m reading or studying. Being able to physically see how the metal really does slowly flow when it’s heated up and to feel the feedback of my strikes against the anvil through my arm really made it a visceral connection to all the things I’d learned. Abstract concepts became cemented in firm reality. Also, it’s just really fun to hit stuff. 

The gentlemen of the Drunken Smithy were excellent teachers. They gave general guidance to the whole group and then one on one assistance as we needed it. They listened to your goals and vision first, to try and give you enough information to go in the direction you desired without holding your hand or doing it for you. They provided just enough scaffolding for us as students of the craft to keep us engaged and excited without feeling overwhelmed. 

They did this by first limiting the range of options we could choose from keeping the initial lessons fairly simple, throwing axes or knives. Each of those options came with a pre-cut piece of metal which meant it shortened the process of crafting considerably. We would not be melting down the metals, mixing them and then shaping our weapons from a hard lump. That would be one too advanced for beginners and two take way too long for a single afternoon. 

I picked a throwing ax, because I am a Viking at heart, and my sister picked the knife. As the one who always has to go slightly off the beaten path, I naturally added a little bit of flair to my ax by splitting butt into two artfully curled pieces. I was informed this was a little more of an advanced technique but rather than discourage me from my vision, they supported me by spending a little more time one on one with me to help me see it through. 

After picking out our templates, we set to work by first making them extremely hot. We did this by placing them inside the forge which is about 1,800 degrees fahrenheit and waited until the metal looked red. Once they were red, we pulled them out with tongs and took them to the anvil. The anvil is a peculiar shape, but each part is useful in creating the different desired shapes of the various tools and weapons a smith may desire to create. The act of hammering causes the metal to flow in a desired direction and shape in the process of “drawing out” the metal. In my case, rather than only focusing on the blade of the ax, I also focused on the butt of the ax. In order to achieve the desired shape, the butt had to be split. They did this by first cutting a small piece of the metal out and then helping me drive down the split. I then drew the metal out in two different directions giving it a distinctive shape. 

What I appreciated about the process was they consistently told us that it was when we felt the blade had reached a desired shape that it was done. They gave praise and constructive feedback about how a given shape may affect the weapon’s performance, but never dissuaded people from what they were doing or trying to achieve. If we were happy with it, they were happy with it. 

After we got our weapons into the general desired shape, we left them all to cool off in sand. As they were cooling, our gracious hosts offered us snacks including sausage that we could roast near the forge. They also allowed us free reign of their drinks which included some delicious cider. If you are a vegetarian, vegan or do not eat pork products you may wish to bring something along as the primary source of protein was sausage.  

After a quick snack, we then went to the sanding machines to further refine and grind down the rougher parts. Once sanded, we dipped them in some sort of chemical that I don’t really remember what they said it was (oil?) to give them a characteristic black color rather than the gray of stainless steel. Then we put the final touches on our work by sharpening the edges into a true blade worthy of the shield wall! 

The day could not have been complete, without some ax throwing. It is a bit trickier than you’d think because the ax has to hit the target bladeside up in order to stick otherwise it bounces harmlessly off. We had a glorious time trying to hit the target and make it stick. My sister was a little better at it than myself, but in my next attempt at ax throwing, I not only hit the target, I managed a bullseye (more on that later). 

Satisfied with our weapons, we got back into our car and the first thing we said was “We have to take Josh!” (our brother). It took almost five years (thanks COVID), but we did return to the forge with our brother and forged again. The smithy has moved to a bigger location and has another expansion in the works. Once again, my sister chose a knife, but a bigger one. I chose an ax (but a bigger one) and my brother also chose an ax. We truly enjoyed both experiences and look forward to returning to the forge for another time. Who says Bucket List items can’t be done more than once? 

How can you forge your own weapon?

If you’re in the south-central PA area then the Drunken Smithy is the best choice. There are blacksmiths throughout the United States, some of them may offer classes like this one. Depending on how hands-on they want to be, the classes may range from a half day (like this one) or several days, if they are trying to give you more of the process. If you want a more intensive course, then your local college, trade school or arts centers may offer an introductory course. Artist Blacksmith Association of North America may be a good online resource to find blacksmiths in your area. 

Be on the lookout for demonstrations and ask the person where they got their start or if they know of any instructors who may be interested in teaching. One of the great things about artisans is that they desire to keep their craft alive especially in this age of technology when crafts are in danger of dying out, so many are very eager to find and direct students to keep the craft alive.

Completed: Feb. 2019 & May 2024 

Miles from home:  23

Cost: Ranges depending on the project and type of class. The Drunken Smithy has weapons ranging from $150 – $375, but they have other options such as rings and flowers which are about $50. 

My siblings and I opted for a more expensive experience. We were able to do this in part because the following month the sister outing was much cheaper. 

She’s a Hooker! Learning to Crochet

My mother was the one who first introduced crochet to me as a craft that was something other than for grandmothers. When she first became disabled, she suddenly found herself with plenty of time on her hands but not a lot of energy by which to do things. She could no longer fill her days with work and housework. She spent most of her time in bed and as so many of us learned during the pandemic, there is only so many TV shows and movies one can watch before feeling stir crazy. So with plenty of time on her hands, she returned to the crafting of her youth, in this particular case knitting and crocheting. Suddenly our house was being filled with piles of yarn that were transformed before my eyes into elegant scarves, beautiful shawls, stylish hats and warm gloves. I was surprised by how the things she made actually looked fashionable. In particular, I was fascinated by crochet with its ability to take on shape and form so unlike other textiles. Naturally, I wanted to learn.

Despite what you may have heard, there was not a strong association between crochet and prostitution. The lace of the ladies of the night had nothing to do with this fine and noble craft! Crochet originated as an art form in the 1800’s coming from “shepherd’s knitting” which was primarily practiced in Denmark and tambour embroidery, a chain-stitch embroidery from China. Despite its French name meaning “hook” it was actually most popular in England, going to show that the upper class English are quite determined to continue the Norman conquest some 800’s years later. Just kidding! The art continued to flourish and especially took off in Ireland during the potato famine as a way for young ladies to earn a living. It wasn’t until about the 1940’s that it became more popular over here in America and of course in the 1970’s it gave rise to the granny squares. 

It was with this long and noble tradition in mind that I picked my first project. A simple hat in lime green. I picked lime green primarily because it was a bright color by which to see and learn on. I sat dutifully next to my mother and she began to teach me. In principle, it is a matter of making a loop and then pulling next bit of yarn through the loop, to make another loop and so on and so forth. They use simple terms like yarn over which is just wrapping the yarn around the hook to be able to pull it through one makes bigger. What makes crochet interesting is that because it is so basic one can do things like wrap more yarn around the hook, pull it through a different hole than the one right next to it, twist it one way or the other in order to make interesting shapes. You can make blankets, clothes, flowers, even toys! The world is really your oyster when it comes to this art form. 

However, as with most things it is easier said than done. One would think that one would get a nice uniform size of loops by dint of the size of the hook. After all patterns call for certain sizes of hook in order to ensure the holes are that size. Not so, apparently I subconsciously tense and my holes become smaller and smaller and smaller until my darn hook can barely fit. Then my stitches become bigger. This pulls the existing fabric one way or the other. At times it was truly an exercise in frustration. My mother gave me different pieces of advice and assisted with getting it less lopsided. She encouraged me to keep trying while her pieces continued to dazzle. She made it look so easy, so relaxing, like going for a stroll in the park. My stroll consisted of going up a mountain in the pouring rain followed by falling down the mountain and landing face first in mud. Still, the hat did get done, misshapened as it was and too small for my own head, it graced the head of a stuffed bear. 

Having been abysmal at crocheting, I tried knitting, another noble art form, but failed to even knit a scarf as the problem of “tightness” was even worse with the knitting needles. I literally could not knit loose enough to fit my needles through the holes I was making as they became ever smaller with each stitch. Alas, it would seem that such an art form is not really for me. 

What can be gleaned from this bucket list item? Was it a failure? A waste of time? First, there is value in persistence even in the face of low performance. After all, no one’s first attempt at anything is particularly spectacular. The point was to gain a greater appreciation for the art, to try my hand at it and get the literal feel for it. I had a much better understanding of crochet afterwards, even though I could not replicate it, I had at least begun to develop an eye for the art form. There was a certain satisfaction in completing the project. Sometimes the act of persistence and perseverance through a difficult task makes the task worth it. After all, does it matter how one summit the mountain? 

One of my mom’s scarves

Finally, it was something that I could do with my mom at a time when she couldn’t do much. She had just suffered a stroke at the age of 46, lost her job, lost her income and a lot of her physical abilities. It kick started the next twenty years of surgeries and multiple hospitalizations. There were times when she almost died and so having spent time with her learning one of her passions was in of itself important. I was able to connect with her in a new way through her art. I may not ever get very good at it, but it is something I shall carry with me as a gift from my mom to me.  I do not have that hat with me anymore. I did not see the need to keep it because I have the memories of learning with my mom.

How can you learn crochet?

In the wake of the pandemic lockdowns, many people took up various arts and crafts, including crocheting. There is a rich world of online tutorials, classes at local craft stores and kits you can buy offline. The start up cost can be very little with kits starting at 15 bucks or so. You don’t even need to leave your house and it’s a small project that can be taken anywhere. 

If crocheting isn’t for you, maybe there’s someone special in your life who has a hobby you’ve been meaning to learn. Take the opportunity to ask them to share their passion; maybe find a small project that you can try your hand at. I’m sure they’ll be glad you asked and afterwards you’ll have a newfound appreciation for what they do. Who knows you may find yourself a new hobby!

Completed: 2007

Miles from home: 0 miles 

Cost: Free materials provided (15 – 20 for a starter kit from amazon)